Crochet Apple Hat Pattern

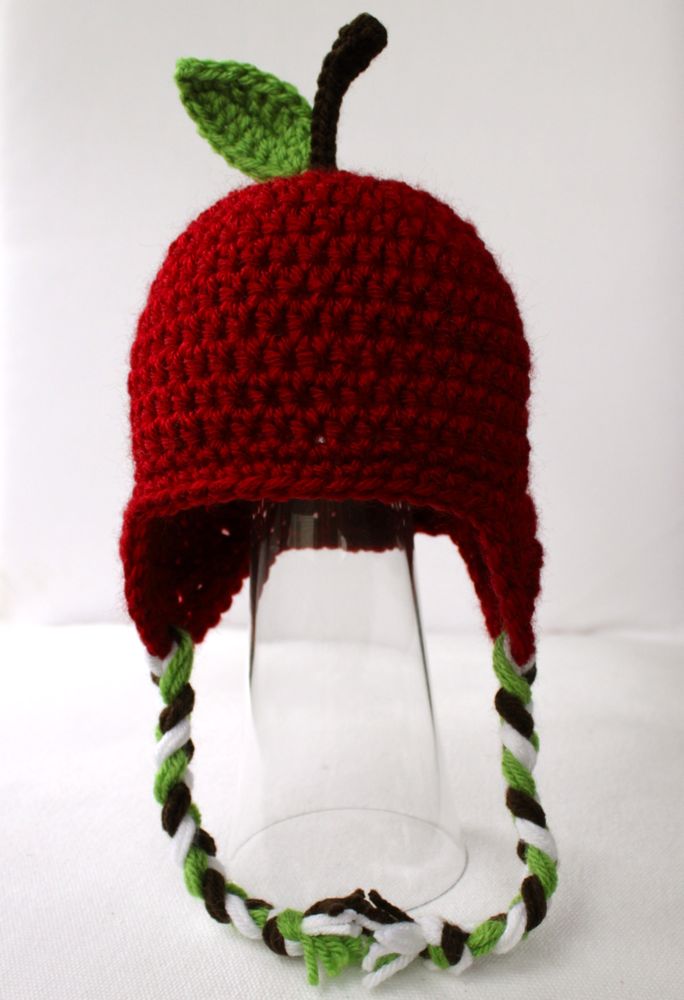
Nothing puts me in the mood to crochet more than cooler temperatures. Fall is my favorite season and I’m so excited it is finally here! One of the best parts of fall is that it is apple season. To celebrate fall (and a friend’s new baby) I had to make an apple hat from my Versatile Earflap Hat Pattern, of course.

To make an apple hat of your own, simply follow the instructions in my pattern available here, making the entire hat in red. Then follow the instructions below to make a stem and a leaf. Sew the stem and leaf to the top of the hat and add braids to the earflaps. Now you have a sweet apple hat too!
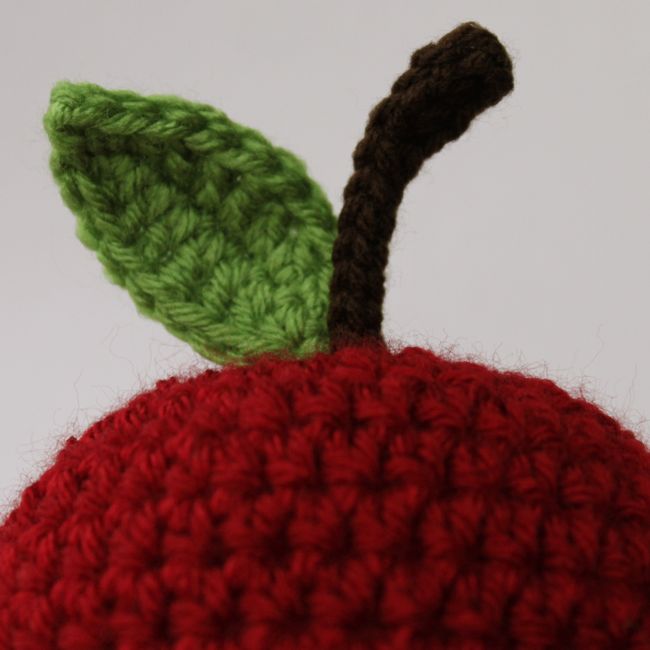
Stem

Ch 12. Dc in 3rd ch from hook, hdc in next ch, sc in next 2 ch, sl st in next 6 ch. Fasten off leaving a long tail to sew the stem to the hat.

Leaf

Ch 10. Sc in 2nd ch from hook, hdc in next ch, dc in next ch, htr (see below) in next 3 ch, dc in next ch, hdc in next ch, sc in last ch. Ch 2, sl st in 2nd ch from hook. Working along the other side of the chain, sc in next ch, hdc in next ch, dc in next ch, htr in next 3 ch, dc in next ch, hdc in next ch, sc in last ch. Fasten off leaving a long tail to sew the leaf to the hat.

Htr (half treble crochet): Yarn over 2 times, insert hook in stitch and draw up a loop (4 loops on hook), yarn over and draw through 2 loops (3 loops on hook), yarn over and draw through 3 loops (1 loop left on hook).
Stars & Stripes Patriotic Crochet Hats

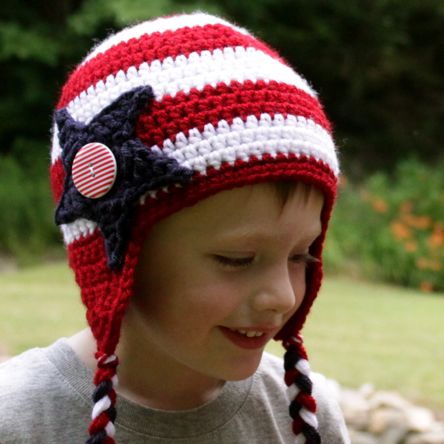
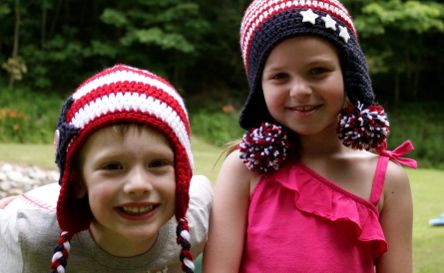
Here in the United States we will be celebrating our nation’s birthday this week on the 4th of July. After seeing lots of beautiful patriotic crocheted items online, I was inspired to make some patriotic hats with my free Versatile Earflap Hat Pattern. The kids only wore the hats for a few minutes, of course, as it was way too hot, but I loved the way they turned out and I hope you will love them too!

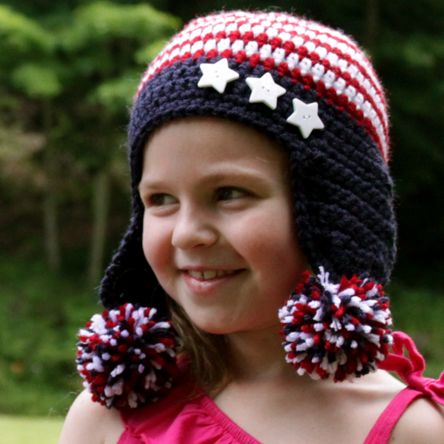
To make these hats, follow the instructions in the free pattern available for download here, changing colors as noted below. Finish off your hats with pom poms, braids or tassels on the earflaps. I found the cute buttons pictured at Hobby Lobby but you could also make some small star appliques out of felt and sew them to your hat.

Stripes and Stars Hat

0-3 Months

  • Beginning with red, alternate working rounds 1 through 9 in red and white
  • Work rounds 10 and 11 in blue, work earflaps and edgings in blue too

3-6 Months

  • Beginning with white, alternate working rounds 1 through 10 in white and red
  • Work rounds 11 and 12 in blue, work earflaps and edgings in blue too

6-12 Months

  • Beginning with red, alternate working rounds 1 through 11 in red and white
  • Work rounds 12 and 13 in blue, work earflaps and edgings in blue too

Toddler

  • Beginning with white, alternate working rounds 1 through 12 in white and red
  • Work rounds 13 through 15 in blue, work earflaps and edgings in blue too

Child

  • Beginning with red, alternate working rounds 1 through 15 in red and white
  • Work rounds 16 through 18 in blue, work earflaps and edgings in blue too

Teen/Adult

  • Beginning with red, alternate working rounds 1 through 17 in red and white
  • Work rounds 18 through 20 in blue, work earflaps and edgings in blue too
Star and Stripes Hat

0-3 Months

  • Round 1 in red
  • Rounds 2 & 3 in white
  • Rounds 4 & 5 in red
  • Rounds 6 & 7 in white
  • Rounds 8 & 9 in red
  • Rounds 10 & 11 in white
  • Work earflaps and both edgings in red

3-6 Months

  • Rounds 1 & 2 in red
  • Rounds 3 & 4 in white
  • Rounds 5 & 6 in red
  • Rounds 7 & 8 in white
  • Rounds 9 & 10 in red
  • Rounds 11 & 12 in white
  • Work earflaps and both edgings in red

6-12 Months

  • Rounds 1 through 3 in red
  • Rounds 4 & 5 in white
  • Rounds 6 & 7 in red
  • Rounds 8 & 9 in white
  • Rounds 10 & 11 in red
  • Rounds 12 & 13 in white
  • Work earflaps and both edgings in red

Toddler

  • Rounds 1 through 3 in white
  • Rounds 4 & 5 in red
  • Rounds 6 & 7 in white
  • Rounds 8 & 9 in red
  • Rounds 10 & 11 in white
  • Rounds 12 & 13 in red
  • Rounds 14 & 15 in white
  • Work earflaps and both edgings in red

Child

  • Rounds 1 through 3 in red
  • Rounds 4 through 6 in white
  • Rounds 7 through 9 in red
  • Rounds 10 through 12 in white
  • Rounds 13 through 15 in red
  • Rounds 16 through 18 in white
  • Work earflaps and both edgings in red

Teen/Adult

  • Rounds 1 & 2 in white
  • Rounds 3 through 5 in red
  • Rounds 6 through 8 in white
  • Rounds 9 through 11 in red
  • Rounds 12 through 14 in white
  • Rounds 15 through 17 in red
  • Rounds 18 through 20 in white
  • Work earflaps and both edgings in red

Large Star Applique

  • Round 1: 5 Sc in a magic circle; do not join.
  • Round 2: 2 Sc in each st around; do not join.
  • Round 3: * Sc in next st, 2 sc in next st * repeat around; do not join.
  • Round 4: * Sc in next st, ch 6, sl st in 2nd ch from hook, sc in next ch, hdc in next ch, dc in next ch, tr in next ch, tr in the same st as sc, sk 2 sts * repeat 4 more times; sl st in first sc to join and fasten off, leaving a long tail for sewing the star to your hat.

Have a happy 4th of July and a great week!

New Pattern Release: Safari Helmet

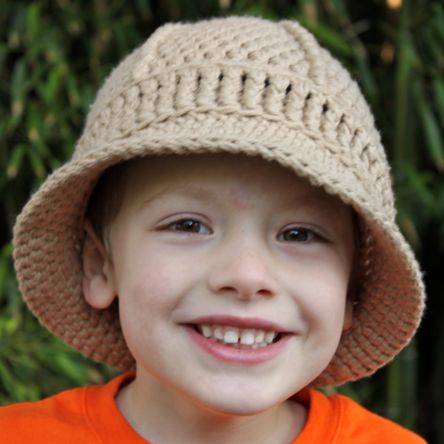
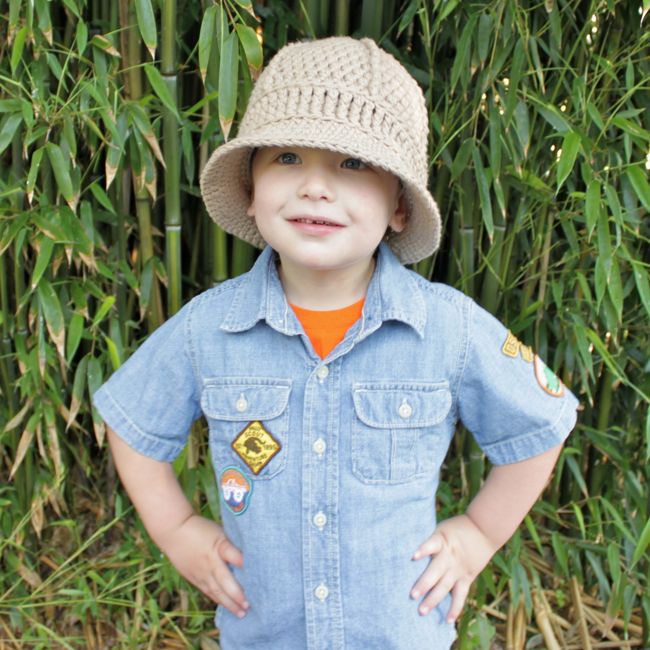
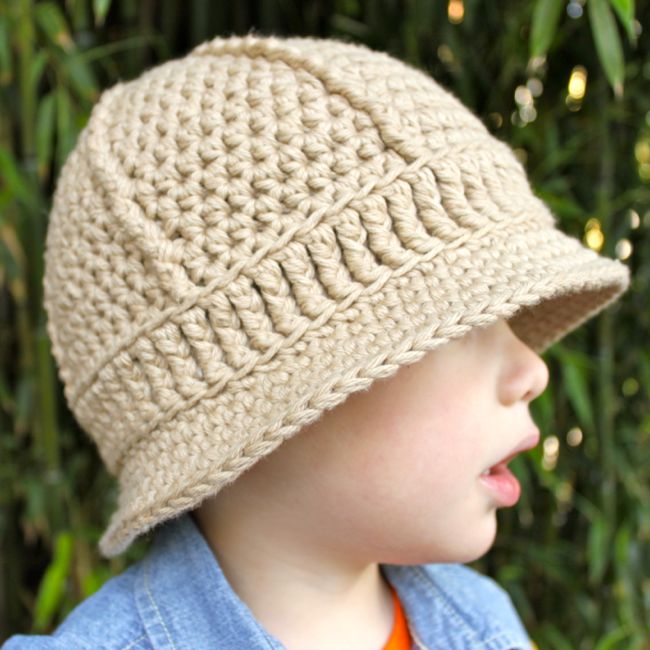
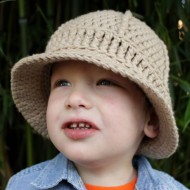
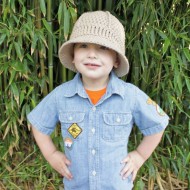
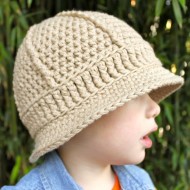
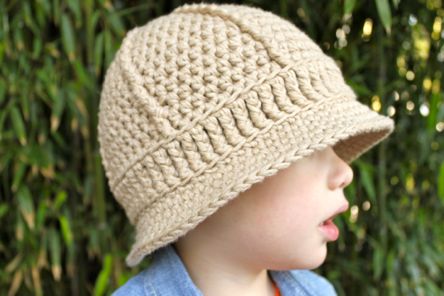
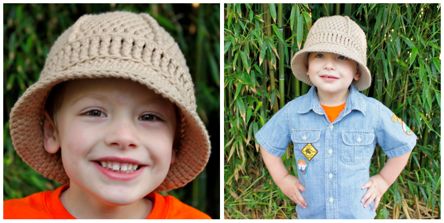
We are beginning our summer with exploring and adventure in our new Safari Helmets, the latest addition to my pattern store. Just like my patterns for the Firefighter Helmet, Train Conductor Cap and Hard Hat Helmet, the Safari Helmet is  great for playing dress-up, as a photography prop, or just a fun way to cover your head.

The Safari Helmet Pattern will be 30% off through June 26th, 2012 to celebrate its release, no promo code needed. I hope you’ll love it as much as we do!

Safari Helmet Pattern

$5.95 USD

Buy Pattern

We’re going on a safari and I’m going to bring…my Safari Helmet, of course! My boys love to play pretend and this hat is just perfect for trekking around the world in search of wildlife and adventure. It is more comfortable to wear than those flimsy plastic dress-up hats and it will last a lot longer too. The Safari Helmet would also be great for a costume or photography prop. This hat is made with two strands of worsted weight yarn and the pattern contains five sizes.

Pattern Sizes

  • 0-6 Months
  • 6-12 Months
  • Toddler (1-2 years)
  • Child (3-8 years)
  • Teen/Adult (9 & up)
Difficulty Rating

Pattern is rated intermediate.

Recommended Supplies
  • #4 Worsted Weight Yarn (I used I Love This Cotton), approximately 145 (195, 230, 260, 310) yards total
  • US I Hook (5.50 mm) or size to obtain gauge
  • Stitch Marker
  • Yarn needle for sewing in yarn ends

Licensing

You are welcome to sell products produced from this pattern, but I do ask that you credit me as the pattern designer as follows:

Pattern by Micah Makes
www.micahmakes.com

Hat Pictures

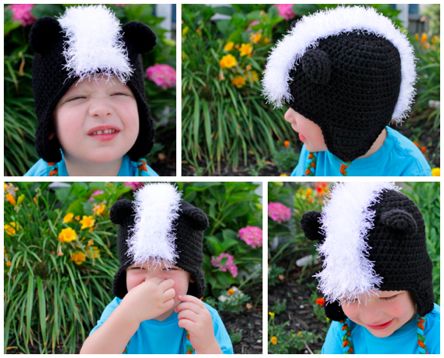
Crochet Skunk Earflap Hat

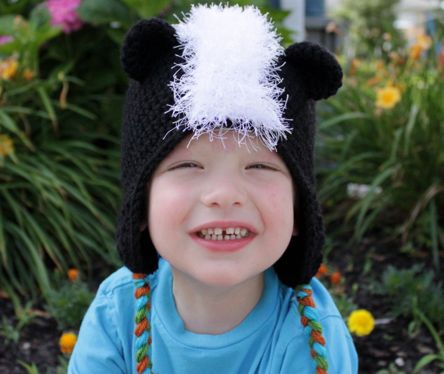
Crochet Skunk Hat

Look at that little stinker – isn’t he cute?!

Another fun hat you can make with my free Versatile Earflap Hat Pattern is a skunk. Simply follow the instructions for the size you would like to make completely in black yarn, then follow the additional instructions below.

White Stripe

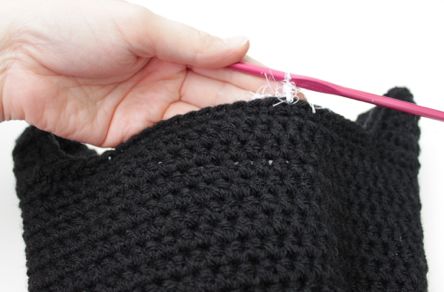
Here is a little illustration for how I made the fuzzy white stripe for my skunk hat. First decide how wide you would like your stripe to be. For this child size hat, I made the stripe 8 stitches wide.


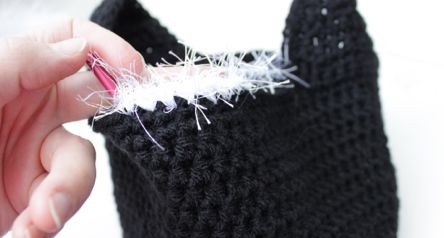
Holding the hat upside down with the front facing you, attach your yarn so that your stipe will be centered across the front of the hat. I used Lion Brand Fun Fur (but any eyelash or fuzzy yarn should work fine) and an I hook.


Sc across the front of the hat as wide as you want your stripe. Then chain 1 and turn your work.


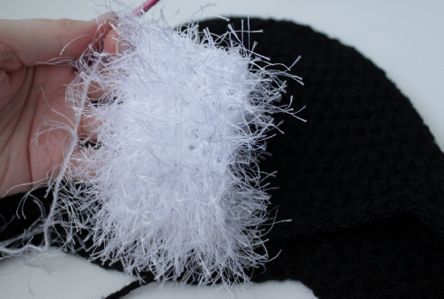
* Sc across, ch 1 and turn* Repeat until…


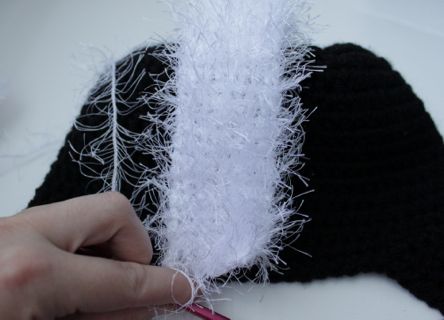
…the stripe can flip over the top and meet the back edge of the hat. Fasten off and sew the end of the stripe to the center back edge. At this point I also tacked the stripe to the hat with a stitch every inch or so along both edges of the stripe. You can do this or just leave it – whatever you want.


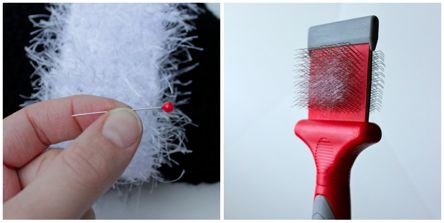
Next I tried to fluff up the Fun Fur a little. There are two ways I like to do this. One way is to use a sewing pin to pull up some of the fur that gets caught in the stitches, and the other way is to lightly brush the stripe with a clean wire pet brush (I swear the white fuzz in the picture is yarn from my fluffy cloud pom poms and not from a pet).

Ears (make 2)

Making the ears is next. Use your black yarn and an H hook. When the ears are completed, squish them in half, position them on the hat and sew in place.
0-3 Months, 3-6 Months and 6-12 Month Sizes

  • Round 1: 6 Sc in a magic circle; do not join, use a stitch marker at the end of rounds if you need to. (6)
  • Round 2: 2 Sc in ea st around; do not join. (12)
  • Round 3: * 2 Sc in next st, sc in next 3 sts * repeat around; do not join. (15)
  • Round 4: Sc in each st around; do not join. (15)
  • Round 5: * Sc2tog, sc in next 3 sts * repeat around; do not join. (12)Sl st in next st and fasten off, leaving a long tail for sewing the ear to the hat.

Toddler, Child and Teen/Adult Sizes

  • Round 1: 6 Sc in a magic circle; do not join, use a stitch marker at the end of rounds if you need to. (6)
  • Round 2: 2 Sc in ea st around; do not join. (12)
  • Round 3: * 2 Sc in next st, sc in next st * repeat around; do not join. (18)
  • Round 4-5: Sc in each st around; do not join. (18)
  • Round 6: * Sc2tog, sc in next 4 sts * repeat around. (15) Sl st in next st and fasten off, leaving a long tail for sewing the ear to the hat.

If you choose, add some braids, tassels or pom poms to the earflaps on your hat and you are done! Thanks for stopping by today and make sure to check back midweek for the newest release in my pattern store – the Safari Helmet Pattern.

Pattern Testing: Safari Helmet – CLOSED

I am so excited that my newest pattern is almost ready, the Safari Helmet! I’m just looking for some testers – do you want to help? This pattern is rated intermediate and you will need to understand the FPdc and its placement to be able to test it.

Guidelines for Pattern Testing

It is really important to me that my patterns are clear and easy-to-follow with no mistakes. I have had some really great testers who have put a lot of effort and attention to detail into the testing process. I always appreciate their efforts to help me produce the best patterns possible!

I know there are lots of people who would like to test and I want to give everyone the opportunity. I will be choosing testers at random from the comments below tonight (Friday June 15th) at midnight EST. All testers will need to return pictures and notes/corrections by email to me by 7pm EST on Monday, June 18th. Pictures will only be for me to see how your projects turned out and how it fits; pictures will not be shared in any way. If you cannot complete the project in the time allotted or do not feel comfortable with FPdc, please do not sign up. There will be more opportunities in the future to test and win free patterns.

Testers who return their pictures and notes in the given time frame will receive a free copy of the final pattern they tested, as well as a coupon code for 50% off any current or future pattern of their choice. If I do not hear back from you, you will be ineligible to test in the future.

If you are interested in testing, please leave one comment below indicating your preference of sizes to test. You are welcome to list as many sizes as you are able to have “modeled” for the picture you send to me (again, I will not post or share your pictures!). I will choose two testers for each size, so please be sure to list your size preferences in order starting with your first choice all in one comment.

Pattern Sizes

    • 0-6 Months
    • 6-12 Months
    • Toddler (1-2 years)
    • Child (3-8 years)
    • Teen/Adult (9 & up)

Thank you so much for your time and willingness to help!

Crochet Ladybug Earflap Hat

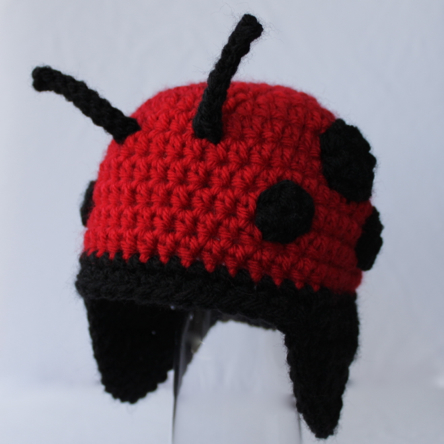
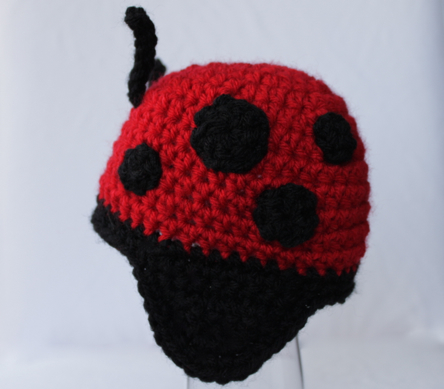
For more summer fun, I made a ladybug hat to share with you this week using my free Versatile Earflap Hat Pattern. I only had time to make a newborn size, but I think that is pretty appropriate considering they are the only ones who would possibly be wearing earflap hats this time of year. Needless to say, I didn’t have a model for newborn size, but I think you’ll agree it would look pretty darn cute!

This hat is super simple to make, and it is easy to modify the pattern to change it into a ladybug. The modifications are the same for all sizes. If you haven’t downloaded the pattern yet, you can do it here, and then just make the following changes:

  • Work all rounds in red (I used Vanna’s Choice in Scarlet – a little brighter than my favorite red, Cranberry, from that line – just perfect for a ladybug).
  • Work both earflaps and both edgings in black.
  • Add spots. For this hat I made four circles of 6 sc in a magic circle, two circles of 7 hdc in a magic circle and two circles or 8 dc in a magic circle. If you like the look of these spots and need help making a magic circle, check out this post. I’m not terribly happy with my spots, for as much as I tried to sew them flat, I think they are too puffy. Next time I will opt for cutting circles from felt and sewing those to the hat instead (which will be much easier anyway).
  • For each antenna, I made a chain of 9, slip stitched in the second chain from the hook and in each chain across. Then I fastened off and attached the antennae with the loose ends.
  • You can finish off your hat by adding braids, tassels or pom poms to the center of each earflap if you like. Or you can just leave them plain. I haven’t decided what to do yet. What would you choose?

I hope you have enjoyed this hat. If you really love ladybugs, be sure to check out the Ladybug Hat (with convertible earflaps) in my pattern store – it is a lot of fun! Thanks for stopping by and have a great week!!

Crochet Bumble Bee Hat Pattern

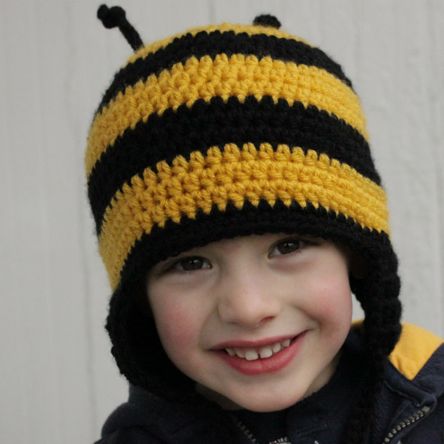
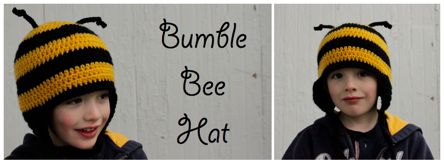
Summer is officially here and it’s time for more summer-inspired versions of my free Versatile Earflap Hat Pattern. This bumble bee is quite a bit cuter than any bumble bees you’ll find in nature, and you can make this hat for your cuties too by following the instructions below. Have fun crocheting!

To make this hat, follow the instructions in my free hat pattern available for download here, changing colors as noted below.

0-3 Months

  • Work rounds 1 through 3 in yellow
  • Switch to black for rounds 4 & 5
  • Switch to yellow for rounds 6 & 7
  • Switch to black for rounds 8 & 9
  • Switch to yellow for rounds 10 & 11
  • Switch to black for earflaps and both edgings

3-6 Months

  • Work rounds 1 through 4 in yellow
  • Switch to black for rounds 5 & 6
  • Switch to yellow for rounds 7 & 8
  • Switch to black for rounds 9 & 10
  • Switch to yellow for rounds 11 & 12
  • Switch to black for earflaps and both edgings

6-12 Months

  • Work rounds 1 through 5 in yellow
  • Switch to black for rounds 6 & 7
  • Switch to yellow for rounds 8 & 9
  • Switch to black for rounds 10 & 11
  • Switch to yellow for rounds 12 & 13
  • Switch to black for earflaps and both edgings

Toddler

  • Work rounds 1 through 7 in yellow
  • Switch to black for rounds 8 & 9
  • Switch to yellow for rounds 10 & 11
  • Switch to black for rounds 12 & 13
  • Switch to yellow for rounds 14 & 15
  • Switch to black for earflaps and both edgings

Child

  • Work rounds 1 through 6 in yellow
  • Switch to black for rounds 7 through 9
  • Switch to yellow for rounds 10 through 12
  • Switch to black for rounds 13 through 15
  • Switch to yellow for rounds 16 through 18
  • Switch to black for earflaps and both edgings

Teen/Adult

  • Work rounds 1 through 8 in yellow
  • Switch to black for rounds 9 through 11
  • Switch to yellow for rounds 12 through 14
  • Switch to black for rounds 15 through 17
  • Switch to yellow for rounds 18 through 20
  • Switch to black for earflaps and both edgings

For the antennae on this child size hat, I made a chain of 15, then slip stitched in the second chain from the hook and in each chain across. Then I fastened off and used the loose ends to tie the antennae on the hat. Last, I tied a knot in the top of each antenna. I think a chain of 15 is a good length for any size hat, but you can always use whatever length suits your preference. The antennae are somewhat floppy, but they will hold their shape for a few seconds if you are trying to get pictures. They are still super cute, even floppy.

Thanks for stopping by! If you have any questions about this hat or anything at all, please don’t hesitate to email me at email hidden; JavaScript is required.

Happy Mother’s Day!

Wow! I can’t believe it has been nearly a month since I posted here. Being a mom sure has you going in a million directions all at once!

I just wanted to pop in today to say that even though it has been quiet around here lately, I have still been working on more fun stuff to share with you. In the meantime, I am offering 30% off any purchase from my pattern store today only, no coupon code required. Happy Mother’s Day!

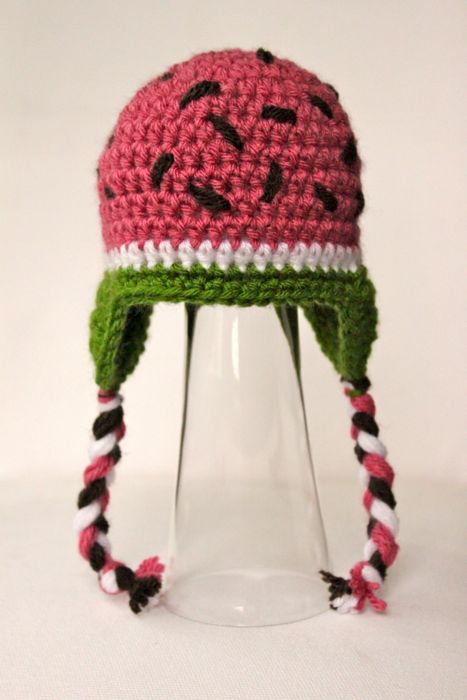
Crochet Watermelon Hat

Here is a fun variation on my Versatile Earflap Hat Pattern for summer – a Watermelon Hat. I’m in one of those phases in my life where it seems like everyone I know is having a baby, and this hat will make such a cute little photo prop for those summer newborns.

The variation for this hat is really simple and will be the same for all sizes. You can download the free pattern for the basic hat here, and then read on for instructions to change the basic hat into a watermelon hat.

Begin by crocheting the hat in either pink or red from the first round all the way to the next-to-last round (example: rounds 1-10 on the 0-3 month size). Change to white for the last round, and then work the earflaps and both edgings in green. Finish the hat off by stitching “seeds” all over, and adding either braids, pom poms or tassels to the earflaps. I made this hat in Vanna’s Choice Yarn in Rose, White, Kelly Green and Espresso.

Thanks for stopping by and have a great week!